Hydro Dipping Process (Water Transfer Printing)
1. Surface Preparation -
The part (metal, plastic, or other material) is cleaned, sanded, and primed to ensure the design sticks properly.
2. Base Coat Application -
A specific base color is applied depending on the final look you want. This helps enhance the pattern's visibility and effect.
3. Film Placement -
A printed hydrographic film (with the design/pattern) is carefully laid on the surface of water in a dipping tank.
4. Activation -
A chemical activator is sprayed on the film, dissolving it into a floating ink layer that can now adhere to surfaces.
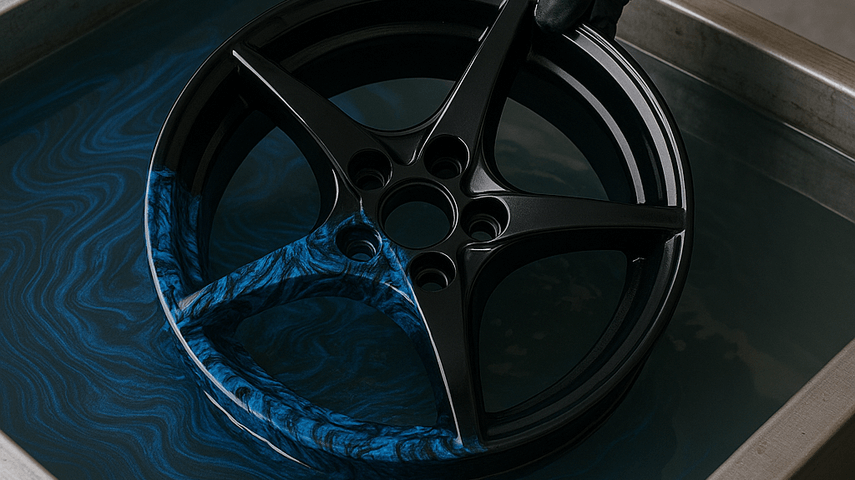
5. Dipping the Part -
The part is slowly and precisely dipped into the water. The ink wraps around it evenly, transferring the design onto the surface.
6. Rinsing -
The dipped part is gently washed to remove any leftover film residue without affecting the design.
7. Drying -
The part is thoroughly dried before the final stage.
8. Clear Coat Finishing -
A protective clear coat (glossy, matte, or satin) is applied to seal the design and add durability and shine.